
Here are my first attempts with 3D printing. My biggest challenge was to find a reasonable 3D program that would work under both Linux and Windows and support STL file export.
Of course I could have just downloaded a standard Arduino case from Thingiverse and modify it to match my Blinkenlighty. But what would I learn that way? Almost nothing. So I aimed to design a case from scratch.
This case is not intended as a full enclosure. It is only the lower half. The idea is to substitute the sticky tape solution that I use right now.
My first attempts were with Tinkercad. Tinkercad looks easy and comes with many nice tutorials. It runs in the browser so no installation is required. The downside is that the work is stored “in the internet” or “in the cloud”. Since I prefer to keep full control of my files I do not like this to much. Anyway it comes for free and seemed to work reasonable well. After some time (maybe 3 or 4 hours) I came up with the following model.
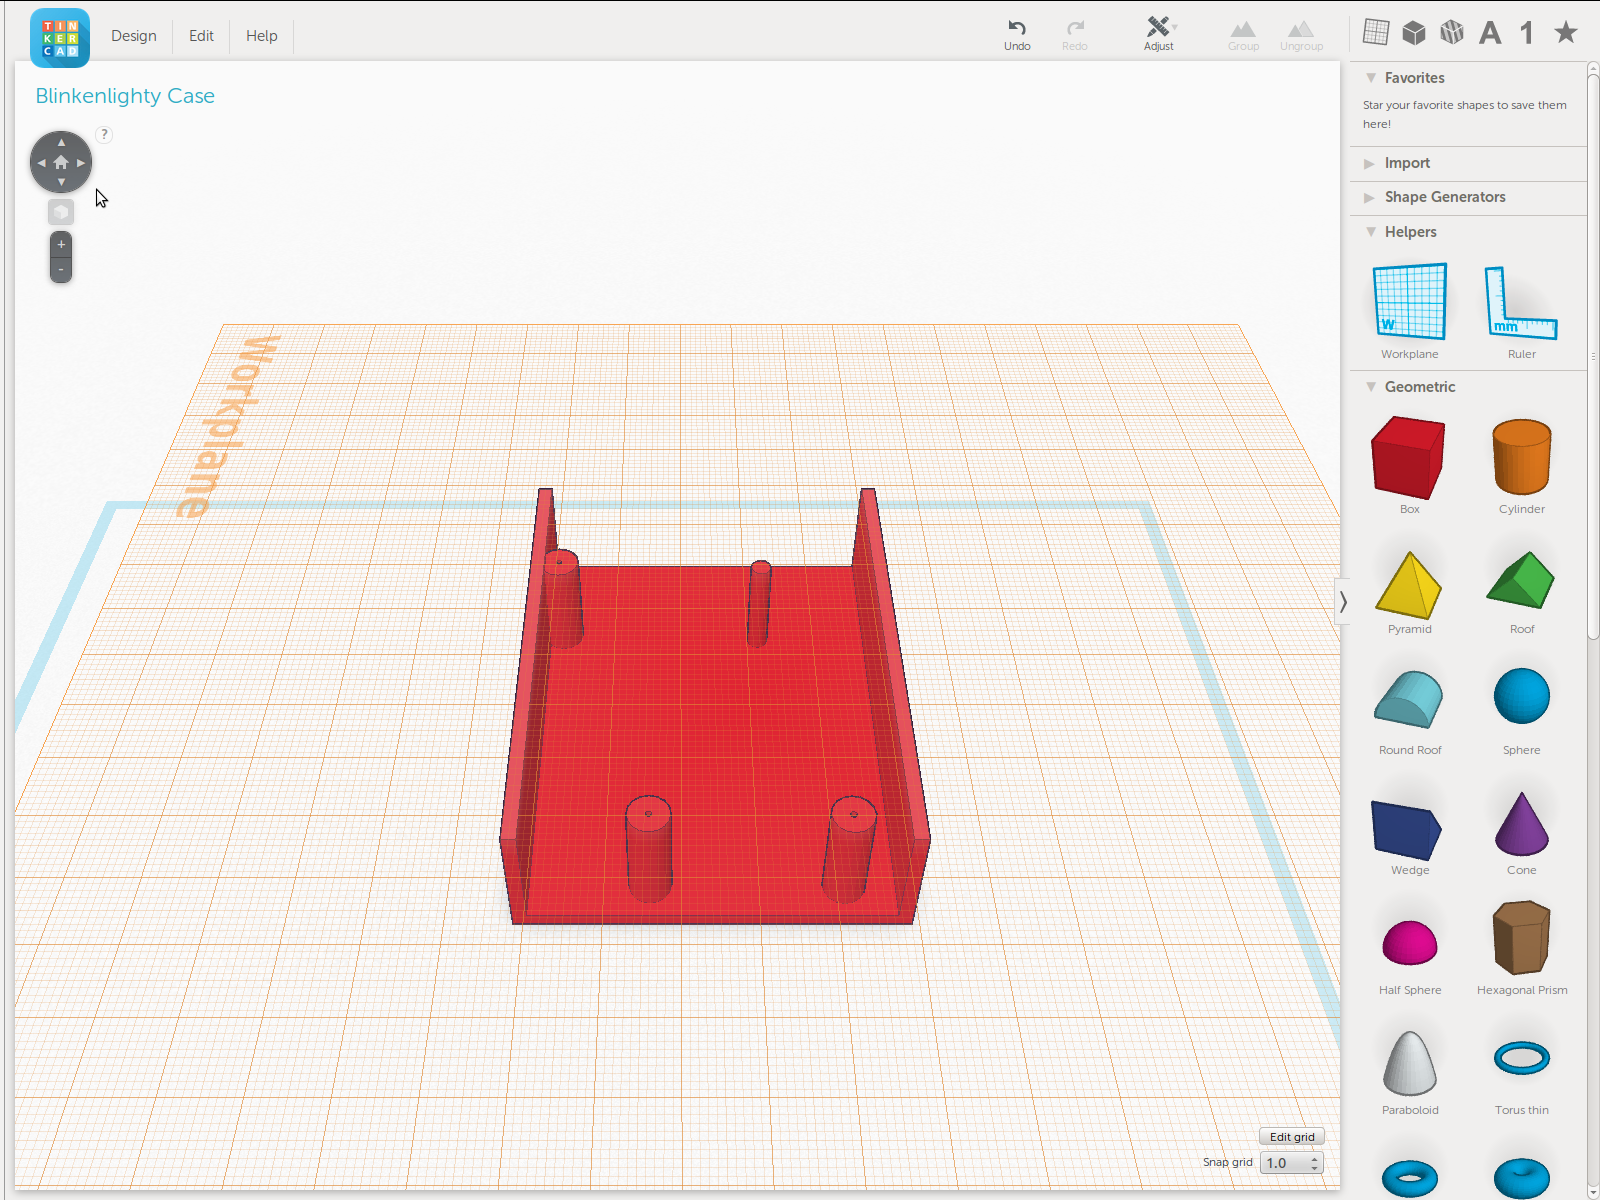
This design actually printed pretty decently. Unfortunately I did not take into account that the printer will have some tolerance that makes walls slightly thicker than designed. Thus the result was slightly to tight for the Blinkenlighty. This is where the trouble started. It turned out that it is pretty anoying to just slightly tweak a design with tinkercad.
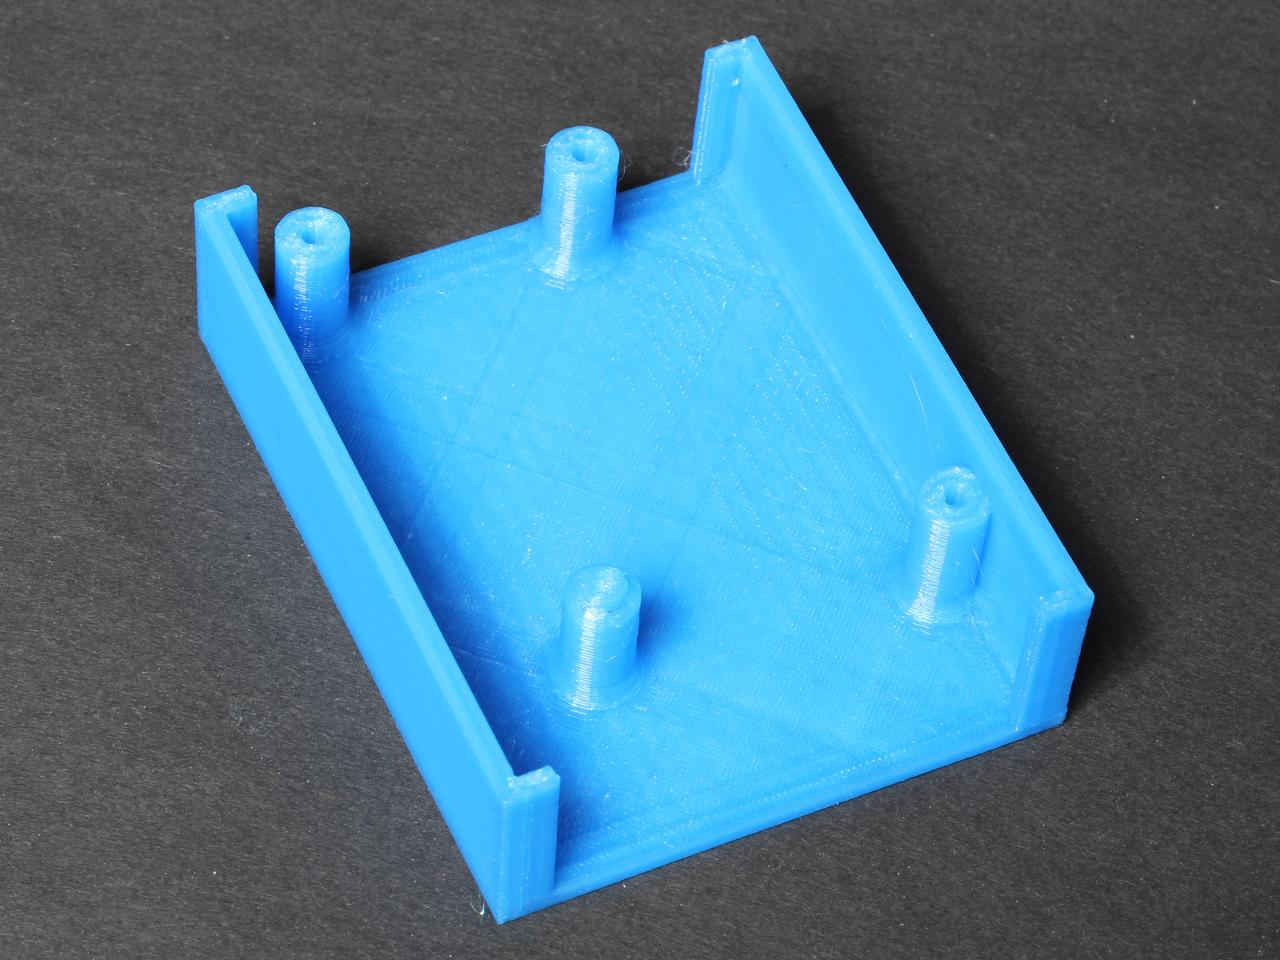
So my next attempt was with openSCAD. At first glance openSCAD looks somehow harder to grasp. Basically it is a programmable 3D plotter with a 3D viewer and it comes with a pretty extensive manual. But once you get the hang of it, it is actually much easier to design with openSCAD than with Tinkercad. The point is that you create “modules” out of basic blocks that you combine to more and more complex reusable building blocks. These blocks are like sub programs, that is you can put parameters into them. As a consequency you can create parametric models. If you do it properly then you can tweak tolerances or wall widths or whatever you want in a matter of seconds.
Have a look at my first attempt with openSCAD.

This took also about 3-4 hours. But have a look at the result. This model contains smooth wall transitions. It can also be easily varied by tweaking the parameters as desired.
The code below is my third model.
//
//  www.blinkenlight.net
//
//  Copyright 2014 Udo Klein
//
//  This program is free software: you can redistribute it and/or modify
//  it under the terms of the GNU General Public License as published by
//  the Free Software Foundation, either version 3 of the License, or
//  (at your option) any later version.
//
//  This program is distributed in the hope that it will be useful,
//  but WITHOUT ANY WARRANTY; without even the implied warranty of
//  MERCHANTABILITY or FITNESS FOR A PARTICULAR PURPOSE. See the
//  GNU General Public License for more details.
//
//  You should have received a copy of the GNU General Public License
//  along with this program. If not, see http://www.gnu.org/licenses/

board_length    = 68.58;
board_width     = 53.34;
board_z         = 14;
wall_height     = 18;
tolerance_delta = 0.3;   // how much the printer may wobble and thus make stuff wider
wall_width      = 2;
epsilon         = 0.001;
peg_smooth_r    = 3;
wall_smooth_r   = 3;
bolt_r          = 3.5;
bolt_drill      = 14;
hole_r          = 1.25;
protrude        = 3;

module chinese_hat(inner_radius, height) {
    rotate_extrude(convexity = 5, $fn=20)
    difference() {
        square([height+inner_radius, height]);
        translate([inner_radius+height, height, 0]) circle(r = height, $fn=20);
    }
}

module bolt(radius, hole_radius, length, depth) {
    difference() {
        cylinder(h=length, r=radius, $fn=20);
        translate([0,0,length-depth]) cylinder(h=length+2, r=hole_radius, $fn=10);
    }
}

module smooth_bolt(radius, hole_radius, length, depth, smooth_radius) {
    union() {
        bolt(radius, hole_radius, length, depth);
        chinese_hat(radius-epsilon, smooth_radius);
    }
}

module smooth_wall_transition(radius, length) {
    difference() {
        cube(size=[radius, radius, length]);
        translate([radius, radius,-1]) cylinder(h=length+2, r=radius, $fn=25);
    }
}

module standard_bolt(x, y) {
    translate([x,y,0]) union() {
        bolt(bolt_r, 1, board_z, bolt_drill);
    }
}

module smooth_standard_bolt(x, y) {
    translate([x,y,0]) union() {
        smooth_bolt(bolt_r, hole_r, board_z, bolt_drill, peg_smooth_r);
    }
}

module distance_peg(x, y) {
    translate([x,y,0]) bolt(2, 0.01, board_z, 0);
}

module smooth_distance_peg(x, y) {
    translate([x,y,0]) union() {
        smooth_bolt(bolt_r, 0.01, board_z-(bolt_r/2), 0, peg_smooth_r);
        translate([0,0,board_z-(bolt_r/2)-epsilon]) chinese_hat(2 , bolt_r-2+epsilon);
    }
}

module bounding_box(inner_length, inner_width, inner_height, wall_width) {
    outer_length = inner_length+2*(wall_width+tolerance_delta);
    outer_width  = inner_width +2*(wall_width+tolerance_delta);
    outer_height = inner_height+wall_width;

    translate([-wall_width-tolerance_delta, -wall_width-tolerance_delta, -wall_width])
         cube(size=[outer_length, outer_width, outer_height]);
}

module empty_enclosure(inner_length, inner_width, inner_height, wall_width) {
    outer_length = inner_length+2*(wall_width+tolerance_delta);
    outer_width  = inner_width +2*(wall_width+tolerance_delta);
    outer_height = inner_height+wall_width;

    translate([-wall_width-tolerance_delta, -wall_width-tolerance_delta, -wall_width])
    difference() {
         cube(size=[outer_length, outer_width, outer_height]);

         // inner floor will be at z = epsilon
         translate([wall_width-epsilon, wall_width, wall_width+epsilon])
             cube(size=[outer_length+2*epsilon-2*wall_width, inner_width+2*tolerance_delta, inner_height+1]);

         // protruding walls
         translate([-2*wall_width, wall_width+tolerance_delta+protrude, wall_width+epsilon])
             cube(size=[4*wall_width+outer_length, inner_width-2*protrude, inner_height+1]);

    }
    translate([board_length+tolerance_delta+epsilon, board_width+tolerance_delta+epsilon,0]) rotate ([90, 0, -90]) smooth_wall_transition(wall_smooth_r, board_length+2*tolerance_delta+2*epsilon);
    translate([-tolerance_delta-epsilon,-tolerance_delta-epsilon,0]) rotate ([90, 0, 90]) smooth_wall_transition(wall_smooth_r, board_length+2*tolerance_delta+2*epsilon);

}

module all() {
    union() {
        intersection() {
            union() {
                smooth_standard_bolt(15.24, 50.8);
                smooth_standard_bolt(66.04, 7.62);
                smooth_standard_bolt(66.04, 35.56);
                smooth_distance_peg(18.5, 16.6);
            }
            bounding_box(board_length, board_width, wall_height, wall_width);
        }

        empty_enclosure(board_length, board_width, wall_height, wall_width);
    }
}

mirror ([1,0,0]) all();
How does this work? The approach that I follow is also known as Constructive Solid Geometry Modelling (CSG). That is I combine primitive shapes like cylinders and cubes to more complex shapes. Combining them is mostly done with the union and difference operators. Positioning them is mostly done with the translate operation. The trickiest piece is actually the chinese hat which is created by means of rotary extrusion of a square minus a translated circle.
Sounds complicated? It is not. The trick is to start piece by piece. Get one piece into shape, make a module out of it and then reuse it over and over again.
Now what about the results. See the picture below for my first three attempts. Although the visible differences are small the second print is significantly sturdier. This is due to the small wall stubs at the end. My third attempt also include them at the front.


Below you can see how the second attempt (first openscad attempt) fits. I would say it fits perfectly well. Finally an enclosure for my Blinkenlighty 🙂

Of course these are just my beginner’s attempts. So you might already find a newer and better version in my github repository. There you also find an STL file which is directly suitable for printing.

